
To add a new Google Font, we'll first add it to the Theme Settings so you can select it, then we'll turn it on. Here's how:
- Go to Admin > Themes > Template editor.
- Open up settings.liquid under Configs.
- Do a ctrl+F for "Google Web Font". Around line 237, you will see a list of Google Web Fonts. This is for the "Logo Font" section (you'll see that heading around line 227).
- At the bottom of the font list, add the new Google Font name, so later you'll be able to select it from theme settings. For example, if your new Google Font was called "NewFont", you would add this to the bottom of the list:
<option value='NewFont'>NewFont</option>
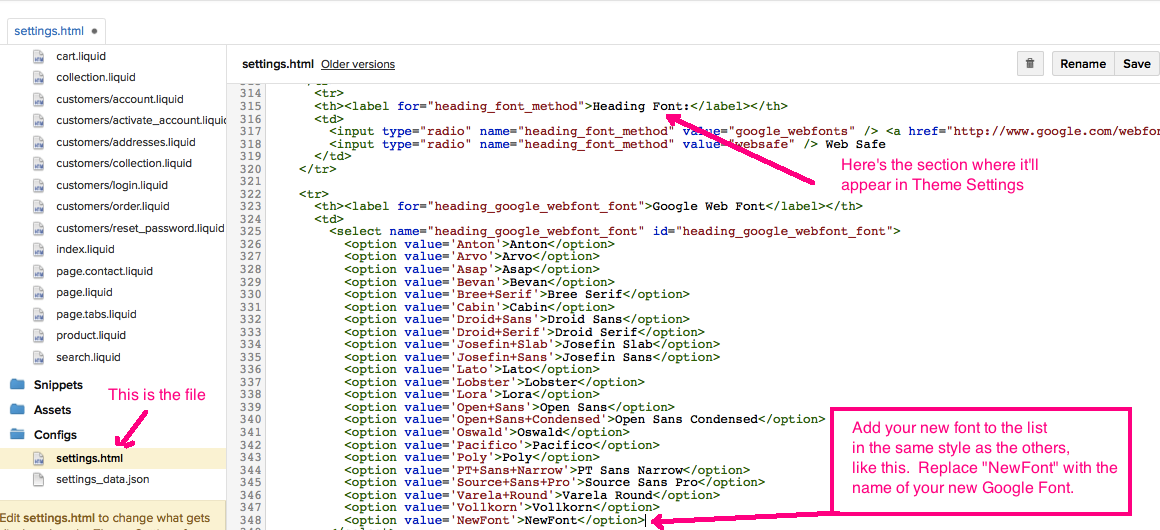
Repeat this for each area you want to have with your Google Font. For example, if you want your new font available for Headings, do another CTRL+F for "Google Web Font", and this should take you down to about line 323, above which you'll see the heading "Heading font". Add the option here as well.
--
Once you've added the font, just go back in and select it. For example, if you added it for Headings above, go to Admin > Themes > Theme Settings > Colors and Typography. Your new "Newfont" will be at the bottom of the list. Select it and it'll appear on your site.

And you're done!

1 Comments